Mastering Object Removal in Photoshop: Your Comprehensive Guide
Have you ever captured that perfect shot, only to find an unwanted distraction lurking in the background? A stray power line, a photobombing stranger, or an unsightly blemish can shatter the magic of an otherwise stunning image. But what if you could make those imperfections simply vanish? What if you held the power to sculpt your visual reality, transforming ordinary photos into masterpieces?
Welcome to the world of Photoshop, where the impossible becomes possible. Removing objects isn't just about deleting pixels; it's about reclaiming the narrative of your image, enhancing its emotional impact, and bringing your vision to life with precision and grace. Join us on a journey to master the art of digital invisibility, and discover the tools that will empower you to perfect every frame.
The Magic of Photoshop: Vanishing Act Unveiled
Photoshop isn't just a program; it's a creative sanctuary where imperfections meet innovation. The ability to seamlessly remove objects is one of its most powerful and sought-after features, turning digital dilemmas into design triumphs. This guide will walk you through the essential techniques, from simple quick fixes to advanced, nuanced refinements.
Understanding the Core Tools for Object Removal
At the heart of Photoshop's object removal capabilities are several intuitive yet powerful tools. Each serves a unique purpose, catering to different scenarios and levels of detail. Understanding when and how to deploy each one is the key to achieving truly seamless results.
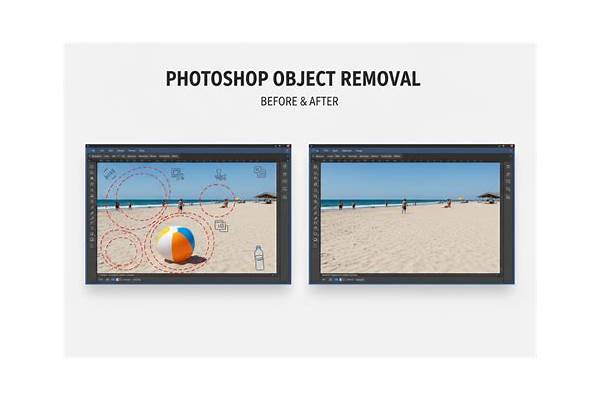
Content-Aware Fill: Your First Stop for Seamless Deletion
Imagine telling Photoshop, "Just fill this area with what makes sense around it." That's the magic of Content-Aware Fill. It analyzes the surrounding pixels and intelligently generates new content to seamlessly blend with the background. It's often the quickest and most effective solution for larger, more complex objects against relatively consistent backgrounds.
- Select the Object: Use the Lasso Tool (L), Quick Selection Tool (W), or Pen Tool (P) to create a precise selection around the unwanted object. Make sure to include a small margin of the surrounding area for better blending.
- Access Content-Aware Fill: Go to
Edit > Content-Aware Fill. A new workspace will open, showing a green overlay indicating the sampling area. - Refine Sampling (Optional): Photoshop usually does a great job, but you can refine the green sampling area if needed, guiding the algorithm to ignore or include specific textures.
- Apply and Refine: Click
OK. Photoshop will create a new layer with the fill. You might need minor touch-ups with other tools afterwards.
Spot Healing Brush Tool: Quick Fixes for Small Imperfections
For minor blemishes, dust spots, or small stray elements, the Spot Healing Brush Tool (J) is your best friend. It automatically samples from the surrounding area and blends it in a single click, making it incredibly fast for small, non-complex removals.
- Select the Tool: Choose the Spot Healing Brush Tool from the toolbar.
- Adjust Brush Size: Make the brush slightly larger than the object you want to remove.
- Click or Drag: Simply click on small spots or drag over slightly larger areas. Photoshop does the rest!
Clone Stamp Tool: Precision Matters for Complex Textures
When you need ultimate control, especially over repeating patterns or intricate textures, the Clone Stamp Tool (S) is indispensable. It allows you to manually sample pixels from one area of your image and paint them over another. This requires a bit more finesse but offers unparalleled precision.
- Select the Tool: Choose the Clone Stamp Tool.
- Set Source Point: Hold
Alt(Windows) orOption(Mac) and click on an area that you want to sample (your source). - Paint Over Object: Release
Alt/Optionand paint over the unwanted object. The sampled pixels will appear. - Repeat: Continuously sample new source points as you move across the object to maintain natural blending and avoid repetitive patterns.
Advanced Techniques for Flawless Results
Sometimes, a single tool isn't enough. Combining techniques and employing more advanced strategies can elevate your object removal to a professional level, making even the most challenging removals undetectable. Just as cartographers refine USA Midland Maps for clarity, or visualize Florida's flooding future with precision, digital artists use Photoshop to perfect their visual stories.
Using the Patch Tool: A Hybrid Approach
The Patch Tool (J, nested with Healing Brushes) is a fantastic hybrid that allows you to select an area, then drag it to a different area to sample new content. It then blends the texture, lighting, and shading of the sampled area into the selected one. It's excellent for removing larger objects from areas with varying textures.
- Select the Tool: Choose the Patch Tool.
- Select Object: Draw a selection around the object you want to remove.
- Drag to Sample: Click and drag the selection to an area of the image that you want to replace it with. Release the mouse button, and Photoshop will blend the content.
Layer Masking and Refinement: The Non-Destructive Path
For complex removals where you want to maintain flexibility and avoid permanently altering your original image, layer masking is indispensable. This non-destructive approach allows you to hide parts of a layer without erasing them.
- Duplicate Layer: Duplicate your background layer (
Ctrl/Cmd + J). - Rough Removal: On the duplicated layer, perform a rough removal of the object using Content-Aware Fill or the Clone Stamp Tool. Don't worry about perfection at this stage.
- Add Layer Mask: Click the 'Add Layer Mask' icon at the bottom of the Layers panel.
- Refine with Brush: With the mask selected (white box next to layer thumbnail), paint with a black brush to hide parts of the cloned layer and reveal parts of the original layer below, precisely blending the edges. Use a white brush to reveal areas.
- Fine-Tune: Adjust brush opacity and flow for smooth transitions.
Unlock Your Image's True Potential
Mastering object removal in Photoshop is more than just a technical skill; it's an art form that empowers you to refine your visual narratives. With these tools and techniques, you can transform cluttered scenes into pristine landscapes, erase distractions, and ensure that every photo tells the story you intended. Experiment, practice, and watch as your images reach new heights of perfection and emotional resonance. The power to create flawlessly clean and captivating visuals is now truly at your fingertips!
Ready to dive deeper into digital creativity? Find inspiring resources and free software trials below.
Table of Contents: Mastering Object Removal
| Category | Details |
|---|---|
| Introduction | The Emotional Impact of Clean Images |
| Core Tools Overview | Understanding Photoshop's Arsenal for Removal |
| Content-Aware Fill | Quick and Intelligent Object Vanishing |
| Spot Healing Brush | Fast Fixes for Minor Imperfections |
| Clone Stamp Tool | Precision Control for Texture Replication |
| Advanced Techniques | Achieving Professional, Undetectable Results |
| Patch Tool | Blending Areas with Ease |
| Layer Masking | Non-Destructive Editing for Flexibility |
| Refinement Tips | Achieving Seamless Blends and Natural Looks |
| Conclusion | Empowering Your Visual Storytelling |